Self-exclusion lets a supporter exclude themselves from your lottery. Once applied, they can't log in on your website or apps. The account stays active, not deactivated or archived, so the exclusion record is kept, and only an operator can lift it.
This guide covers the initial setup. For day-to-day use, see Self-exclude a supporter and Lift a self-exclusion.
Assign capabilities
Self-exclusion is controlled by four role capabilities:
- Customer view – needed for all self-exclusion actions
- Customer self-exclude – apply a self-exclusion to a supporter's account
- Lift self-exclusion – remove a self-exclusion once the minimum period has passed
- Lift self-exclusion (exception) – remove a self-exclusion at any time, including before the minimum period has passed
You can assign these under Operations > Manage operators > Manage operator roles.
Turn on self-exclusion
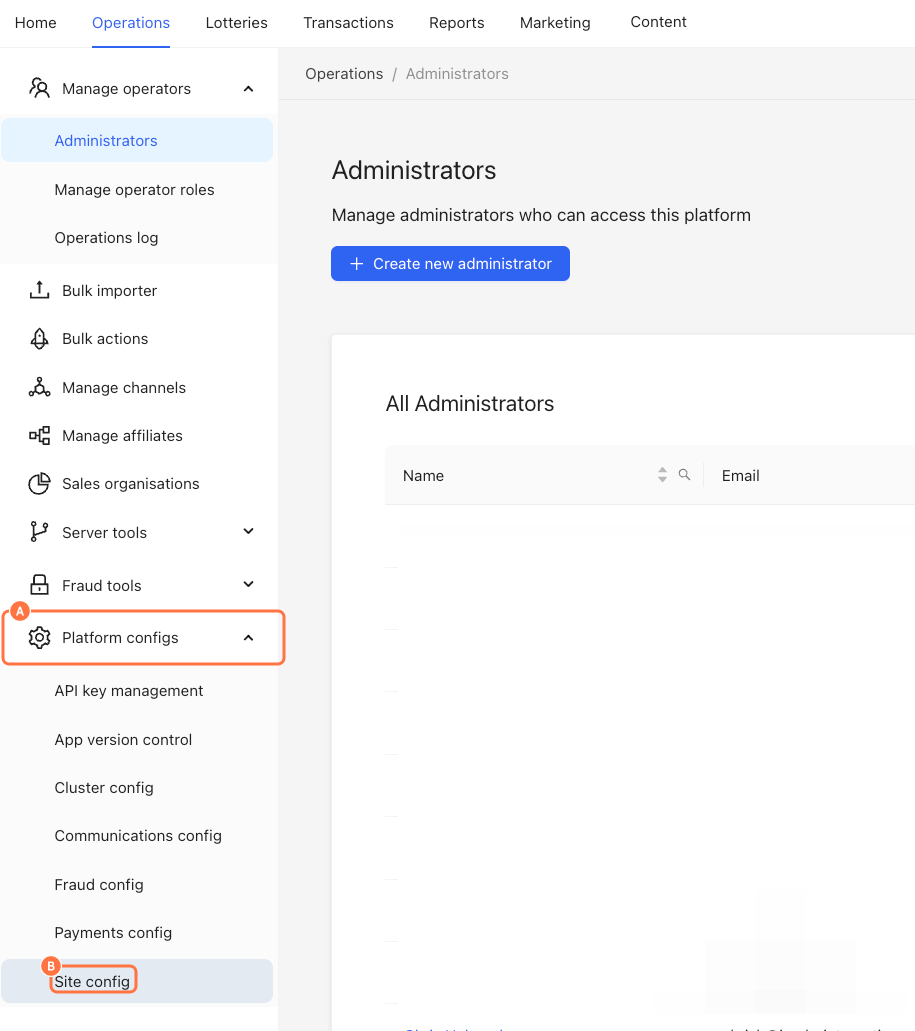
- Go to Operations > Platform configs > Site config.
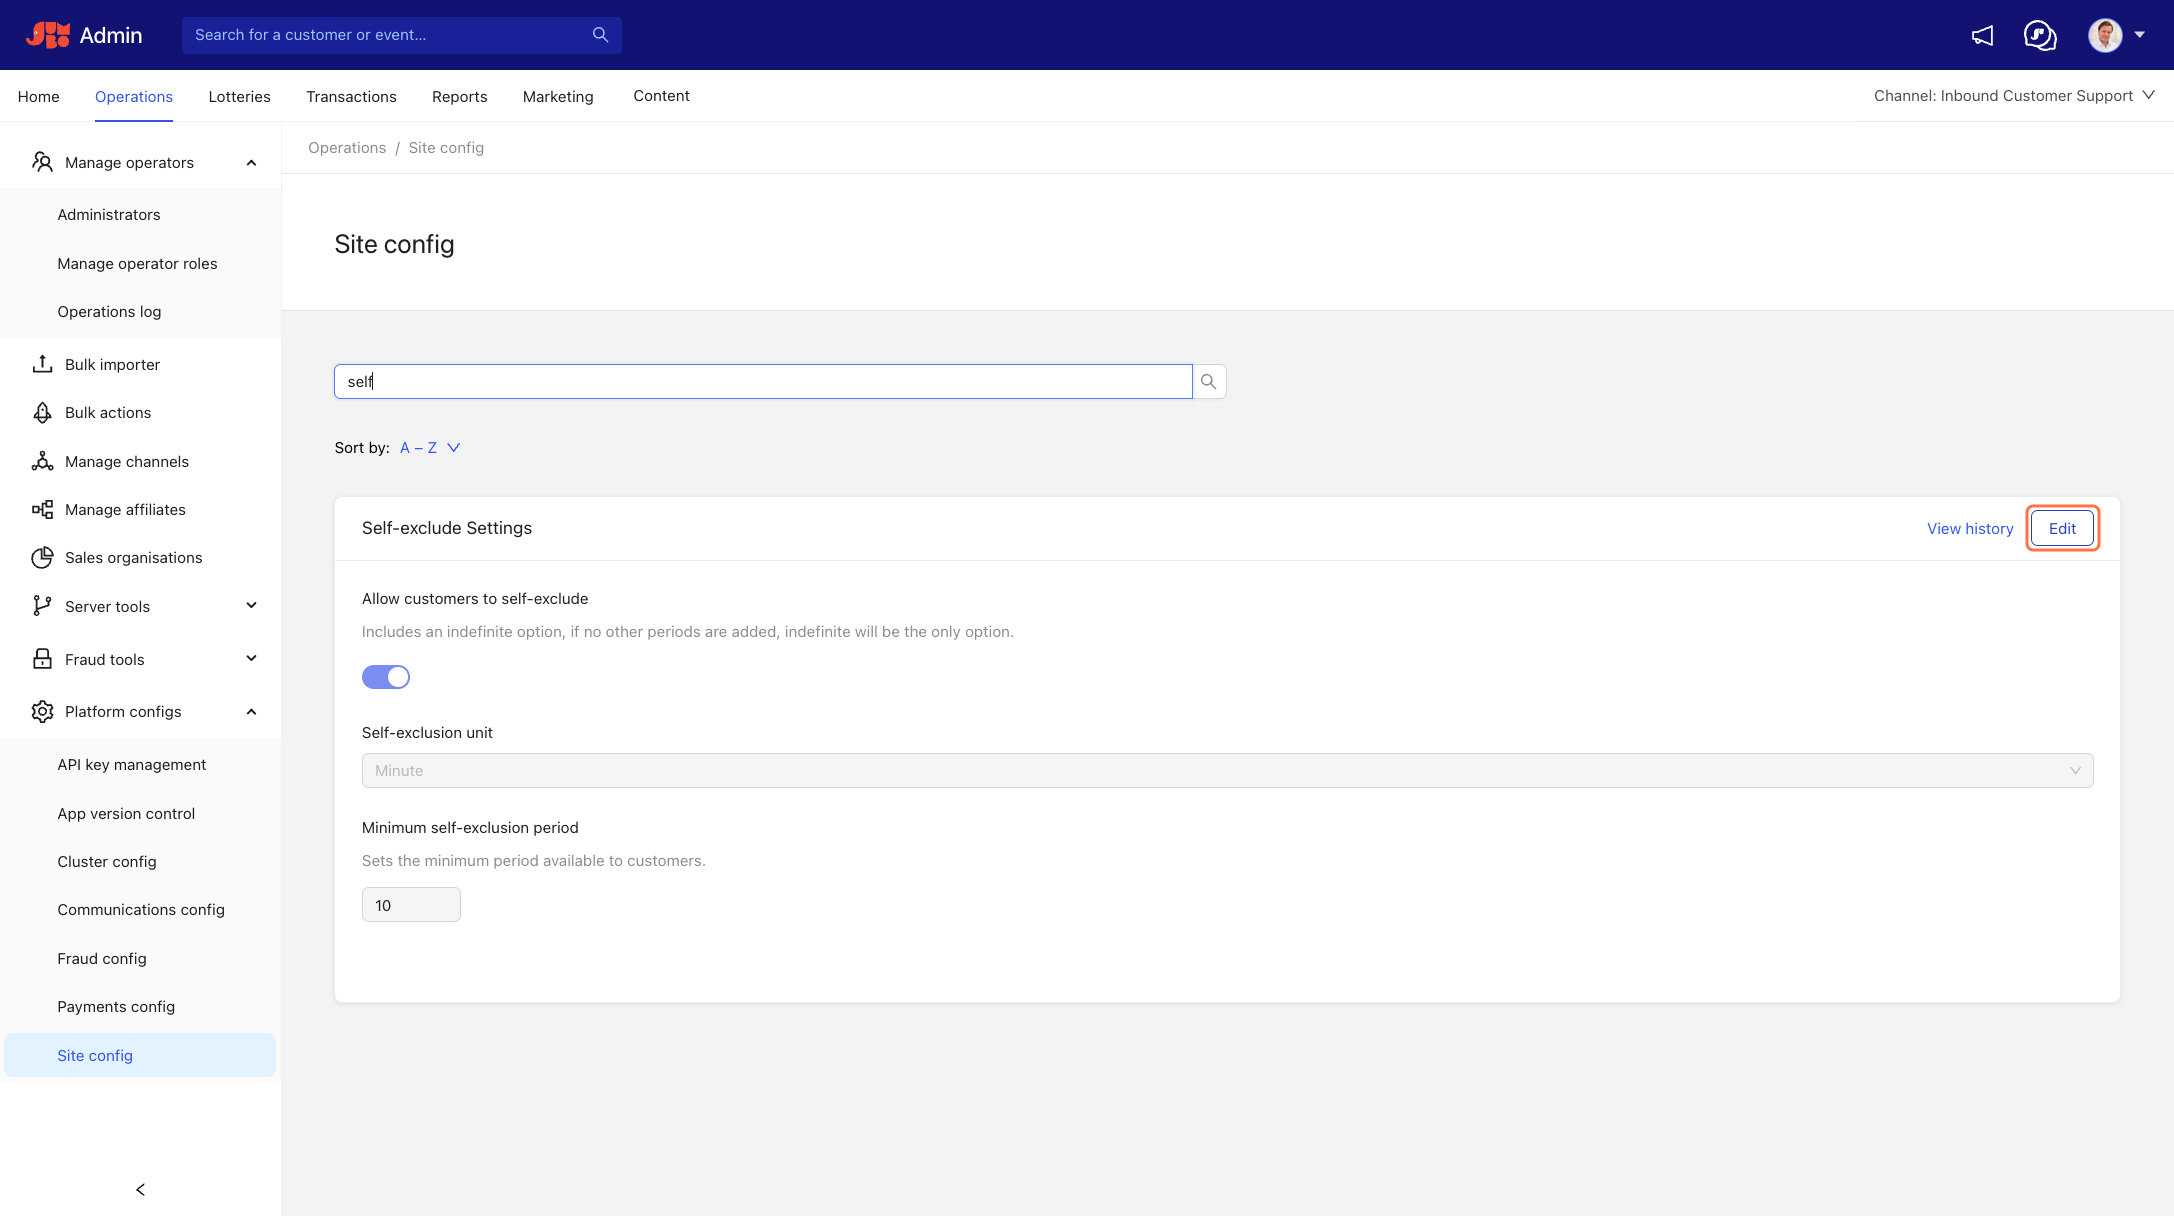
- Search for Self-exclude settings and click Edit.
- Toggle on Allow customers to self-exclude.
- Select a unit of time for the self-exclusion period (Day, Week, Month or Year).
- Set the Minimum self-exclusion period.
- Click Save.
Turn on self-exclusion emails
To email supporters when a self-exclusion is applied or lifted, go to Marketing > Emails > System Emails and turn on both the Self-Exclusion and Self-Exclusion Lifted emails. If these emails are not available to you, please contact Customer Success.
Change the wording supporters see
The self-exclusion wording on your website and apps can be updated through translation keys. To find out more, contact your Customer Success Manager.